vanillabox Prototyping

Over at Just Add Sharks we're building our own laser cutter and that means design revisions and multiple prototypes. I'm sure you all saw our previous version built over the course of a weekend and intended to test several design choices, such as the gantry mounted tube and the grbl/visicut software combination. We threw together an acrylic box full of interesting curves and features but when I got it home it felt very impractical. The curve on the lid was pretty wonky and I felt we needed to go back to the drawing board to design something we could actually build in quantity. With two weeks to go till the maker faire and a broken laser it was a pretty big task, but I'm very happy with this new revision.

The first significant change was to rebuild the gantry, the previous build used a large box section but that was replaced with a single sheet, the rail gives it strength and the stepper and drive belt can be fixed to it with minimal change. The laser tube mounts on the back half of the gantry, I flipped the tube to fire to the right so that the origin can be in the top left hand corner (like computer coordinates). The wires were routed in different directions leaving all the high voltage and pipes running through a cable guide on the right hand side and the signal wires running through the left hand side. On the right hand side the water/air pipes can just run straight out the back of the box.

The gantry rails were moved onto the side walls of the cutter, this makes it fair easier to lift the gantry up to the top of the machine and gives a nice large cutting area free of obstructions. The two walls of the laser cutter hold the rails, stepper motors and belts, all of the electronics are mounted on the reverse of the wall. The three main precision parts of this build can now be cut from simple flat sheets of metal. The laser cutter is actually functional with just 2 walls and a base to hold them apart, it would be very wobbly but all the essential alignment items are held tight on the gantry.

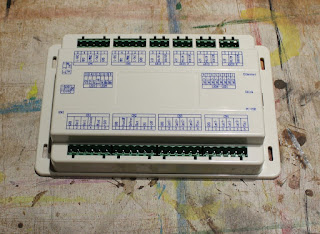
The design splits up the electronics into the two pods on the left and right of the machine, all the mains powered things are in the right and all the control electronics are in the left. The only wires running across the box are 24V supply for the steppers/controllers and the right hand Y axis stepper motor wires. A single curved panel over the pod provides some style as well as easy access to the internals when required. Lights mounted on the walls provide good illumination throughout the box.

This version of the vanillabox is functional, we're due to get some cutting videos up shortly. The final box will obviously be made of metal (due to wood flammability issues). The lid will undoubtedly change and be replaced for a metal piece with a laser absorbing window. My challenge now is to get the box drawn and professionally manufactured so we can finalise the price tag.